
|

|
SPRING HOME IMPROVEMENT

|

|


|
|
|
|
|
|
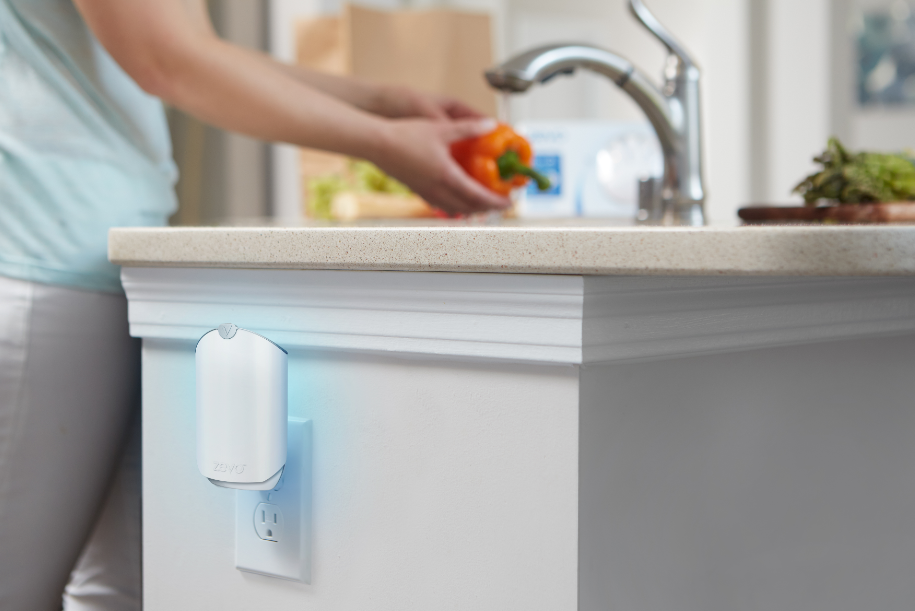 (StatePoint) With warmer weather on the way, it’s time to deal with the associated household hassles of the season. Here are three hacks that will help you create a healthy, comfortable home during the months ahead: Beat the Heat Beyond having your HVAC unit serviced and changing your air filter regularly, you can beat the heat at home with a few smart strategies. One change you can make today that will also reduce your carbon footprint is to swap out your heat-emitting incandescent light bulbs for cool LEDs. Likewise, appliances that are not in use but plugged in could be generating unnecessary warmth, so unplug when you can. Finally, use shades and blinds strategically to block out the sun and prevent a greenhouse effect indoors. Banish Flying Bugs Fruit flies, gnats and flies tend to proliferate indoors in the warmer months. Not only do these creatures come with a serious ick factor, they can harm your houseplants and even put your family’s health at risk by carrying germs from dirty surfaces to clean ones. A safe and easy way to defend against buzzing invaders is to plug Zevo Bug Traps into outlets around your home, especially in areas where these bugs enter your home and gather, like garages, entryways, covered porches, trash cans, drain pipes and kitchens. Rather than relying on chemical insecticides, they use multi-spectrum light technology that bugs find irresistible. Once attracted, flying insects are trapped in a super-sticky adhesive backing. Each trap cartridge offers continuous defense for up to 45 days or until it’s full. When you’re done with a cartridge, simply throw it in the trash and slide a new one in, without ever having to touch the dead bugs. Pair these traps with Zevo home bug sprays, which are powered by essential oils, for whole home protection. To learn more about defending your home against insects, and for trapping tips, visit zevoinsect.com. Master Mold Thriving in warm wet environments, mold is something to watch out for at home, especially during spring and summer. Much more than an eyesore, mold is bad for your home’s infrastructure and bad for you. Mold can cause a number of allergic reactions and can sometimes even be toxic. However, you can reduce the risk of mold forming by managing your home’s humidity. Use fans and other ventilation in bathrooms and the kitchen when showering, running the dishwasher and doing other tasks that invite humidity. Test the humidity of various rooms in your home with a hygrometer and use a dehumidifier where needed. According to the EPA, the ideal indoor humidity is between 30 and 50%. Employing warm weather hacks at home can help you maintain clean, comfortable spaces, all season long. ***** ----------------------------------------------- ----------------------------------------------- PHOTO SOURCE: PHOTO CAPTION: Free your home of buzzing invaders with easy-to-use bug traps. 
0 Comments
 12 Steps Once the snow has disappeared, the ice melted in your pond, and the temperatures have been consistently above 40°F for a week or more, it’s time to open up your pond and garden pond water features for the spring. Below are 12 steps to lead you through the clean-up process. Step 1. Rake up and dispose of leaves in the area surrounding your pondand remove. Then, remove the pond netting (which was hopefully installed in the fall to prevent the leaves from falling into the pond). Step 2. Use a skimmer net or pond vacuum to remove debris from the pond. A long handled brush is also helpful in removing string algae. Step 3. Clean up your water plants, cutting back dead debris and bringing pots that were placed in deeper levels to over winter to their proper location. If water plants are overgrown, spring is an excellent time to divide and repot, with the exception of early blooming plants such as Iris’s. Aquatic pots, planting soil and fertilizer will be needed to repot existing plants. Begin fertilizing with aquatic plants in late April or early May. Step 4a. If your pond has minimal debris and sludge build-up, perform a 25% water change. Note: Before adding new water, be sure to add a water conditioner that will remove chlorine and chloramines from city water, detoxify heavy metals in well water, and reduce fish stress by adding essential electrolytes, replacing the fishes slime coat. Step 4b .If your pond has significant sludge and debris (1”or more) after the initial skimming and vacuuming, you should perform a complete water change. Prior to performing a complete water change set up a temporary tank for your fish using water from the ponds surface (do not pull water from the sludge laden bottom that may contain significant toxic gases). Add an aerator or pump to the tank to add oxygen to the water. The tank should be set in the shade and covered to prevent the fish from jumping out and predators from getting in. Do not feed the fish while they are in the temporary tank. Prior to returning the fish to the newly cleaned pond add a water conditioner to remove chlorine, chloramines and heavy metals. Also, if the temperature of the new pond water is more than 2ºF different than that of temporary tank, the fish should be placed in plastic bags with water from the temporary tank and floated in the pond for 10 to 30 minutes prior to release. The floating time will vary based on the temperature difference: if the difference is 5ºF or more, replace 25% of the water in the bag with pond water every 10 minutes until the temperature of the bag water is within 2ºF of the pond water. When releasing the fish into the pond, carefully net the fish out of the bag and dispose of the bag water on the ground. When cleaning the sludge from the pond bottom a pond or wet/dry vacuum can be very helpful. Be sure to set the vacuum outside the pond for easy empting. Step 5. Reconnect your pump and filter. If the filter or skimmer pads were not cleaned in the fall, they should be rinsed prior to restarting your pump. Do not over clean your filter pads or use any form of soap, or bleach on the pads. If pads are badly worn or torn they should be replaced. If new pads need to be purchased, consider upgrading to the new “Matala” pads. Matala is easier to clean and lasts longer than the traditional filter pads. Step 6. Test your water quality using an at home pond test kit. The Ammonia and Nitrites levels should read zero. If higher than zero, an additional 25% water change should be done until the levels are reduced. pH should be between 6.5 & 8.5. If the pH is outside this range add pH Up or pH Down and pH Buffer according to the directions on the container. If you have fish in your pond, the salinity should be between .1% and .25%. To achieve a salinity of .1% (assuming your current salinity is 0%) add 1 pound of Pond Salt per hundred gallons of water. Pond salt is 100% pure salt, contains no additives and is in large crystal form for slow release. Step 7. Add a Spring Cold Water Cleaning Bacteria to breakdown remaining sludge and a Start-Up Bacteria to re-colonize beneficial bacteria in your bio-filter; and Liquid Barley Straw Extract to help keep your pond water clean and clear. Step 8. If you have an Ultraviolet (UV) Light Clarifier or Sterilizer to prevent green water, replace the bulb and clean the quartz sleeve that covers the bulb. However, do not turn the UV unit on until the bacteria have had 48 hours to colonize. Step 9. Prepare for The Return Of The Heron by placing fishing line around the edge of your pond, netting the pond, installing a Koi Castle to provide a safe area in the pond for fish to hide or installing a motion detection device (ScareCrow) to scare away predators. Step 10. You can begin feeding your fish when water temperatures remain at 50°F or higher. Use a Pond Thermometer to test the waters temperature. From 50 to 65°F, feed fish once weekly and at 65°F and above, feed fish every other day with a Spring Fish Food that is wheat germ based and contains vitamin C and immune stimulants for optimum fish health, or a higher end koi food that has additional additives such as: high levels of spirulina and montmarillonite clay for color enhancement, beta glucan that stimulates immune systems to prevent disease and infections and added vitamin C. Step 11. To keep your pond clear and healthy, and to breakdown sludge and debris throughout the season add an all season Beneficial Bacteria and Liquid Barley Straw Extract on a regular basis; and once the water temperatures are consistently 60°F or higher, begin adding a Sludge Remover which is available in a liquid, granular or pellet form. If your pond has green or brown water a Water Clarifier to quickly clear up murky water caused by floating organic and inorganic particles by pulling these floating particles together and settling them to the bottom. If this is an ongoing problem look at adding an UltraViolet Light. Step 12. Enjoy the beauty and tranquility your pond brings you each day!  Use this Garage Spring Cleaning Checklist to create functional, clutter-free storage for your tools and cars. 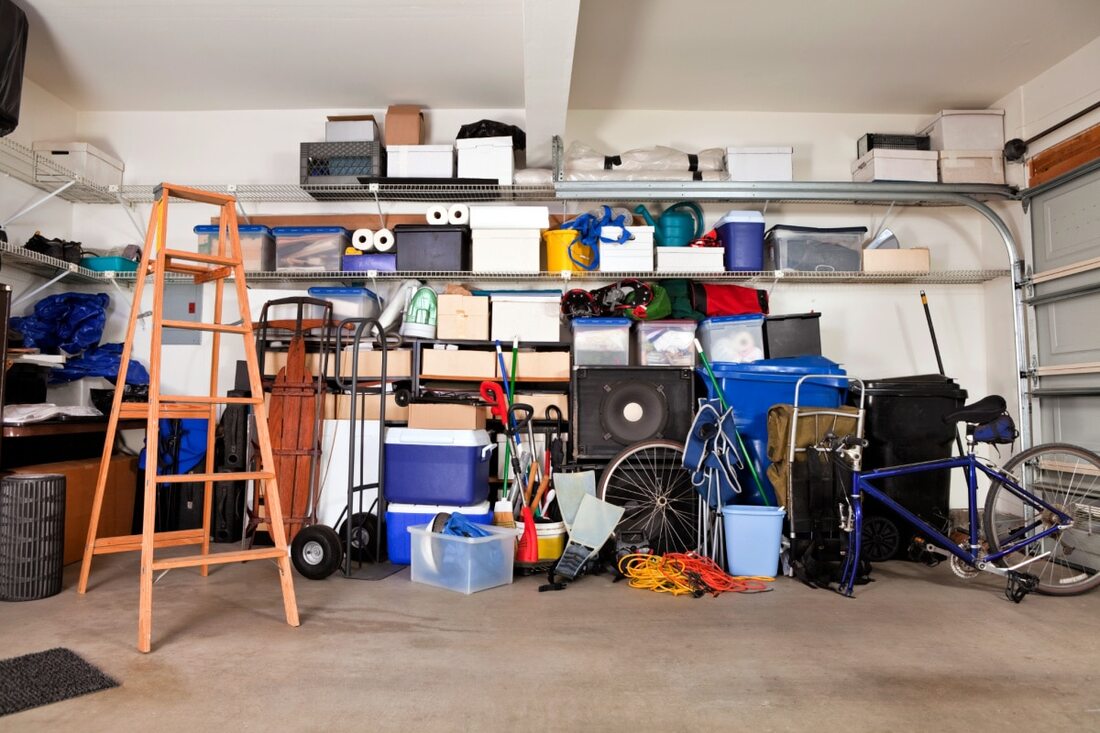 Do you park in your garage? Not every family does. In some homes, the garage serves as a huge walk-in storage closet for sports gear, tools, and holiday decorations. The garage serves as extra living space in other homes where it serves as a home gym, rec room, or den. But no matter what purpose your home’s garage serves, they all get cluttered and dirty. Spring Cleaning your garage is a chance to get it in shape and clutter-free. How To Spring Clean Your Garage The great thing about using a checklist is how clear it makes each step: do this and move onto that. If you’re working alone, you can divide the work over several days by doing one section at a time. Or, if you’d like your teens to do it, hand them a checklist, so they know exactly what needs to get done. Equipment You’ll Need:
It’s always a good idea to start a decluttering project with a plan for how you’ll handle the clutter you’re getting rid of. So, make sure you’ve got trash bags or bins ready for any recycling or trash you find. Keep hazardous waste like paint, lawn and garden chemicals, and paint thinner out of your trash. Those belong in a separate box, so you can take them to your nearest waste disposal facility. You’ll probably also want a box for things to donate or give away. Start by hauling everything out to the driveway. Completely emptying the garage may sound like a lot of effort, but it makes cleaning and organizing the contents much more manageable since it gives you two chances to purge excess stuff. So, as you empty the garage, toss the trash and recyclables, or set aside items you plan to donate or give away. You’ll get another chance to evaluate everything before you put it back in your garage. 2. Work in This Order The key to cleaning efficiently is working top to bottom, left to right, so you’re moving dirt down and then out of a space. Using an extension duster, clean the ceiling, corners, and walls. Close the garage door and clean the inside of it — it’s amazing how dirty the inside of a garage door can get! Inspect the garage door fasteners and handles while it’s closed and tighten any that are loose. Then open the door and clean the tracks. If the floor of your garage is covered with oily spots or grime, scrub it with a little liquid dish detergent in a bucket of hot water. Treat stains on the garage’s cement floor while it’s empty. Then, while the floor dries, clean the rest of the garage fixtures: light switches, door trim, and knobs, plus the garage opener button. If you’ve been thinking about painting your garage, this is a great time to do it — and there’s no rule that says you’ve got to stick with flat white! 3. Make It Functional Many of us use our garage for multiple purposes. The key to good garage organization is separating areas for the different ways we use it. Do you have a workbench in your garage? A pile of sports equipment? Do you store your holiday decorations in there? Visualize the different ways you use your garage and plan to keep similar items together so they’re easier to use. Look for ways to use vertical space in your garage, rather than storing things on the floor where they’re susceptible to damage from insects, rodents, and water. Keeping your garage floor clear also makes it easier to keep it clean. You can make or install shelving, or consider adding pegboard to the walls to provide hanging storage for tools, sports equipment, and other items. Then use a black permanent marker or paint to trace around the things you’ve hung so family members know where to return things after use. 4. Purge More Clutter Once your garage floor is dry, and you’ve determined where your storage zones will be, start moving things back into your garage. Keep heavy items on bottom shelves to avoid the risk of injury. Items that you don’t use very often — like Christmas decor or Easter baskets — should go on the highest shelves. Use easily reachable storage for things you need often, and keep similar things together. So, all of your camping gear goes in one zone, while sports equipment belongs in a different one. Continue purging clutter as you put things away. If you haven’t used it in a few years, there’s no point in letting it take up storage space. Set aside those items you no longer use or want to keep and throw away anything that’s broken or worn out. If you’re not up to making a trip to the local charity, list your unwanted stuff as “free to pick up” on Freecycle or Craig’s List. You can also check Facebook for your local “Buy Nothing” group or list it on NextDoor to see if any neighbors want it. Take a Drive Don’t put off dealing with the items you’ve decided to donate or take for waste disposal. Put them in your car and get rid of them now, so they don’t sneak back onto your clean garage’s shelves. Sure, you’re probably tired and would prefer to take a rest, but think of what a nice-looking garage you’ll come home to once you’ve finished getting rid of the clutter.  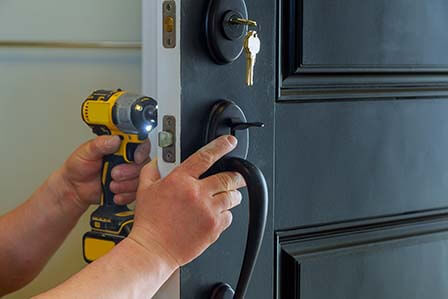 Spring is an exciting time of the year, but it is also a time to get things done. Apart from spring cleaning, there are many other things you should do in order to make sure that your home is safe as the seasons change. These include door lock maintenance. Following are 6 spring cleaning maintenance tips for your door locks: 1. Make Sure Your Door is Hung Properly A door lock will only work correctly if the door itself is hung properly. A door that binds or the one that sags can put a lot of pressure on the lock’s latch or bolt, ultimately leading to the failure of the lock. On the other hand, if the door is hung properly, it will never bind. Apart from this, it is recommended that you make sure that the gap between the door and its frame is uniform throughout the door space. 2. Check the Strike Plates and Screws of Your Door The best way to prevent the door from sagging is to buy and install long screws. This will also increase the door’s break-in resistance. Generally, three-inch screws are enough for each hinge. Another thing you should keep in mind is that the long screws should be positioned near the door wall’s center. It is also recommended that you check the strike plates of the door and make sure that the plate which is designed for the deadbolt is secured to the wall framing via long screws. 3. Make Sure Your Deadlatch and Deadbolt Work Properly The deadlatch shouldn’t fall into the strike plate of the door. This is a very important security feature that is built into every modern door lock and it will not work properly if the door deadlatch and deadbolt are not installed or working properly. Even though not all deadbolts are created equally, a door deadbolt functions as the basic element of a home security. 4. Clean Your Door Locks Don’t forget to clean your door locks during spring cleaning maintenance. To do this, you can use a mild detergent. Avoid using chemical or abrasive cleaners on your locks. Don’t use petroleum as it can also damage your door lock’s finish. 5. Lubricate Your Door Locks This is another important maintenance factor that you should keep in mind during your spring cleaning. Locks get loaded with dirt after constant use. This can lead to the lock mechanism sticking problem as they don’t work smoothly. It is recommended that you use graphite lubricants as they work perfectly for door locks. You can use any other dry lubricant for this purpose, just make sure it is easy to apply. 6. Duplicate Keys from Your Original Keys Keys generally tend to wear out long before the locks do. So, during your spring cleaning maintenance, it is recommended that you duplicate keys from your original door lock keys. This is an important step of door lock maintenance. You should also set aside the door lock’s original keys and use the duplicate ones in the future.  Spring time often brings cleaning and yardwork to the top of your to-do list. One of the most important areas for outdoor maintenance in your home is also one of the most frequently forgotten: your roof!  1. Clean your gutters. Throughout the winter, debris tends to build up in your gutters and downspouts. If leaves, twigs, or dirt are clogging up your gutters, they won’t be able to do their job properly when the next spring rainstorm rolls around. Thoroughly clean out your gutters with a special gutter scoop so that you won’t damage them in the process. Spread out a tarp on the lawn below to collect the debris as it falls. 2. Inspect your shingles. Check for any shingles that are missing, curling, or worn down. If you aren’t comfortable getting up on your roof, you can do a partial visual inspection from the ground. If you are comfortable checking your roof, make sure to use a sturdy ladder and bring a buddy along for safety. Look for any shingles with cracks, curled edges, or loose nails. If you notice large areas of damaged shingles, it may be time for a roof repair or replacement this spring. 3. Check for mold or algae. Since moisture can collect on your roof throughout the winter, it is pretty common to find some mold or algae growth. While you are inspecting your shingles, be on the lookout for these pests. There are DIY treatment options for mold removal on your roof, but talk to a professional roofer before you start pouring any chemicals up there. 4. Document any damage. If you notice missing or broken shingles, damaged soffit or fascia, mold growth, or any other roof problems, document them with photos. Your home insurance will probably cover some roof damage, especially after a storm. But first you need to provide evidence of the extent of the damage. 5. Schedule a professional inspection. If you notice anything amiss on top of your roof, (or even if you don’t), provide yourself with peace of mind by scheduling a professional roof inspection. A licensed and experienced roofer will be able to help you determine the extent of your roof damage and whether it needs a simple patch, an involved repair, or a total replacement. Your roof protects your attic and home interior, so it is worth the investment to make sure it can keep moisture out of your home properly. We hope these spring roof maintenance tips help you prepare for the new season!   As spring approaches, it's time to think about a little more than just cleaning. The season is also a good time to assess and maintain your plumbing system. Regular maintenance can help to decrease the chances of serious problems with your system and prevent costly damage and a visit from a professional. Here is your spring plumbing maintenance checklist: Check for Piping Leaks Take a look at faucets for leaks by confirming there is no water escaping around the connections when faucets are shut off. If new leaks are found, install new fixtures or repair where the leaks are in order to prevent damage and improve your water bill. Then look for pipes visible anywhere in your home like under sinks or in the basement and repeat the procedure above. Check for Toilet Leaks Look for leaks in both the bowl and tank. If everything looks good, place a half a dozen drops of food dye into the tank. Wait to see if the dye ends up in the bowl itself. If there is color in the bowl after an hour, you could have a leak in the system which needs to be checked out by a professional. Maintain Water Heater Newer water heaters are more efficient, so check to see how old yours is. Generally, it’s good to begin thinking of a new one if it is 15 years old or older. Regardless of its age, there are a few things you can do to make sure it is running at its peak. To make sure you are spending less money on your energy bill, make sure the water heater is set no higher than 120 degrees. Additionally, for safety reasons, move any items around the water heater away from the unit. This may also increase efficiency. Check Appliances For all appliances like your dishwasher, washing machine or ice maker, check your water supply hoses for leaks or bulging. If hoses are older than ten years or showing signs of weakness, replace them completely. Use stainless steel hoses which are stronger, more reliable and less prone to wear and tear like other hoses. In addition, to ensure that no material is finding its way into your plumbing and piping system, check the lint trap on your washing machine. Make sure there is one equipped and then place a wire trap or pantyhose on the end of hose that drains water out of the washer. Test Out Sump Pump To make sure your sump pump is operating effectively, pour a bucket of water into the pit where the sump pump sits. The sump pump should immediately activate, drain the water, then deactivate. If it doesn’t do this, you know you have an issue with the unit that needs to be addressed. Outdoor Plumbing and Draining Don’t forget to go outside and check on the various pipes and drains that surround your home. Make sure any yard drains, gutters, or downspouts are clear and open of any debris. Look for anything blocking any vents. Check exterior faucets to make sure the water is flowing properly and that there has been no piping that needs to be replaced due inclement weather. Water may leak out of faucet if there is a problem the first time you turn it on. Once you have worked through this checklist, you are off to a good start to ensuring your plumbing system is healthy and ready for the spring and summer weather. If you do find something that you don’t feel comfortable assessing or fixing, please feel free to call us for help!  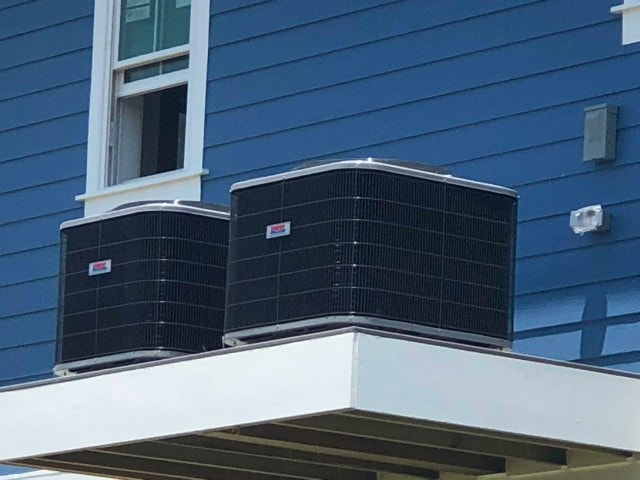 Ah, Springtime! It officially begins on March 20 this year. If you are tidying up and performing your traditional spring cleaning, don’t forget your A/C check-up. A little time and money spent now on an air conditioning tune-up can save you during the cooling season. Our 7 best spring cleaning tips for your HVAC system will help you keep everything humming along. Plus, you may be eligible for a free A/C tune-up! How Much Money Can Proper HVAC Maintenance Save?First, let’s talk about why it’s important to maintain your HVAC system. Your cooling system accounts for 60-70 percent of your summer electric bill, according to Austin Energy. On an annual basis, heating and cooling consumes more than 50% of the electricity used in your household. Proper scheduled maintenance of your HVAC system helps to keep it running efficiently. Also, if your HVAC unit is more than 15 years old, consider replacing it with a high efficiency system. That could cut your heating and cooling costs by 20-40%. 7 Tips for AC Maintenance
 |
 RSS Feed