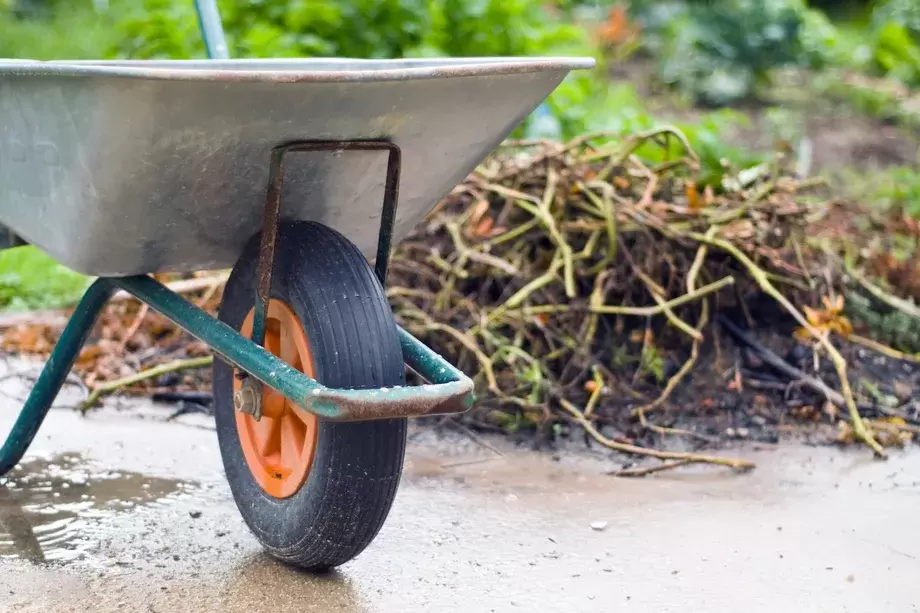
Tackle a little early spring maintenance now to get your yard ready for the growth spurt to come.It’s Clean-Up SeasonStill, some early spring cleanup tasks are sure things this time of year. So go ahead and remove the burlap from trees and shrubs as the weather warms. Prune away winter-killed branches to make room for new growth. Cut back spent perennials and pull up old annuals if you didn't get around to it last fall. Then look around. "March is a good time to take stock of your yard and see if it's time to thin out crowded beds and do some transplanting to fill in bare spots," says This Old House landscape contractor Roger Cook. Trees and Shrubs1. Prune away dead and damaged branches. Where tree or shrub branches have been damaged by cold, snow, and wind, prune back to live stems; use a handsaw for any larger than ½ inch in diameter. Shaping hedges with hand pruners, rather than electric shears, prevents a thick outer layer of growth that prohibits sunlight and air from reaching the shrub's center. At right, Roger neatens up a yew by pruning wayward shoots back to an intersecting branch. Prune summer-flowering shrubs, such as Rose of Sharon, before buds swell, but wait to prune spring bloomers, like forsythia, until after they flower. Trim overgrown evergreens back to a branch whose direction you want to encourage. TOH Pro Lawn Care Tip: Roger Cook, TOH Landscape Contractor says, "Now's the time to get some basic spring yard maintenance done. Then, as temperatures warm up, you'll be in better shape for seeding and planting, and for enjoying the outdoors." Perennials and Grasses2. Cut back and divide perennials as needed. Prune flowering perennials to a height of 4–5 inches and ornamental grasses to 2–3 inches to allow new growth to shoot up. Where soil has thawed, dig up perennials, such as daylilies and hostas, to thin crowded beds; divide them, leaving at least three stems per clump, and transplant them to fill in sparse areas. Cut back winter-damaged rose canes to 1 inch below the blackened area. On climbers, keep younger green canes and remove older woody ones; neaten them up by bending the canes horizontally and tipping the buds downward. Use jute twine or gentle Velcro fasteners to hold the canes in place. A pair of sharp bypass pruners makes a clean cut on both dead and living foliage. Beds and Borders3. Clean Up Around Plants. Next on the spring yard clean up checklist, rake out fallen leaves and dead foliage (which can smother plants and foster disease), pull up spent annuals, and toss in a wheelbarrow with other organic yard waste. Once the threat of frost has passed, Roger also removes existing mulch to set the stage for a new layer once spring planting is done. Push heaved plants back into flower beds and borders, tamping them down around the base with your foot, or use a shovel to replant them. Now is a good time to spread a pelletized fertilizer tailored to existing plantings on the soil's surface so that spring rains can carry it to the roots. Add a 5-10-10 fertilizer around bulbs as soon as they flower to maximize bloom time and feed next season's growth. Use pins to fasten drip irrigation lines that have come loose and a square-head shovel to give beds a clean edge and keep turf grass from growing into them. Composting4. Compost Yard Waste. Dump collected leaves, cuttings, spent foliage, and last season's mulch into your compost pile, or make a simple corral by joining sections of wire fence (available at home centers) into a 3-by-3-by-3-foot cube like the one above. Shred leaves and chip branches larger than ½ inch in diameter to accelerate decomposition, or add a bagged compost starter to the pile. Keep the pile as moist as a wrung-out sponge, and aerate it with a pitchfork every two weeks. Just don't add any early spring weeds that have gone to seed—they might not cook completely and could sprout instead. Lawn Care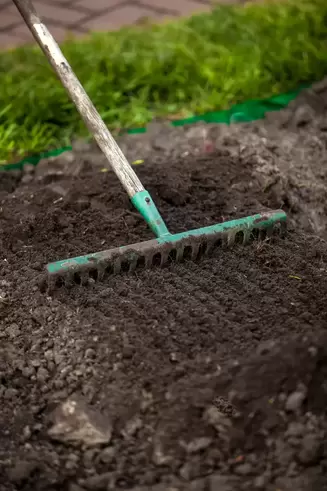 5. Prep Damaged Lawn Areas for Spring Seeding. In colder climates grass starts growing in April, but early spring is a good time to test the soil's pH so that you can assemble the right amendments. Remove turf damaged by salt, plows, or disease to prepare for the seeding that should follow in a few weeks. Work in a ½-inch layer of compost to keep the new seed moist, increasing the germination rate. Begin seeding once forsythia starts blooming in your area. In warmer climates, March is a good time to add the first dose of fertilizer and crabgrass treatment. Remove dead turf with a square metal rake, then flip it over to spread compost. Paths and Patios6. Neaten Up Hardscape Surfaces. Rake escaped gravel back into aggregate walkways and patios, and order more gravel to spread in large depressions, which often form near the driveway's apron. Refill joints between flagstones by sweeping in new sand or stone dust; water with a hose to set it, then repeat. If the freeze-thaw cycle has heaved pavers out of place, remove them and replenish the base material as needed before setting pavers back in. Use a pressure washer with a low-pressure tip to remove slippery algae spots or leaf stains from patios and walkways. Fences and Trellises
0 Comments
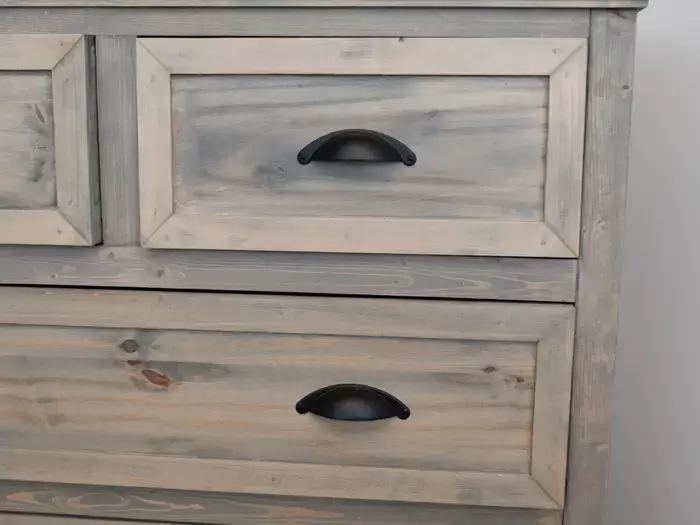
If you're wanting to spruce up your home but don't want to spend a lot of money, there are a number of things you can do to give it a new, more lavish look. Changing up the lighting in your space can make it look bigger and more lavish.Adding a statement light fixture is always a worthy investment, according to Rushda Hakim, senior designer at Interior Marketing Group. It creates a focal point in a living or dining room and elevates the space, she explained. If you're looking for an extra affordable upgrade, consider buying a simple drum or cylinder lamp shade for your existing lights, Hakim added. Create a mirror wall to make your space look even larger.Hanging decorative mirrors is an easy and inexpensive way to instantly change the look of any room, said Hakim. They can reflect light and increase visual square footage, she explained. "We love to use a series of mirrors to create a statement 'mirror wall,'" Hakim told Insider. "Depending on where you purchase the mirrors, you can replicate this design technique for under $500. Think Ikea, Target, and Home Depot." An accent table can help you to upgrade a space in a stylish and practical way.Another great way to mix up a room is to fill tiny spaces with something that serves a purpose, such as a small accent table, said Javier Fernandez, owner of and designer at Transitional Designs. To add a touch of elegance to your room, consider placing a metal accent table alongside or in between chairs, he told Insider. Repainting your walls or covering them with wallpaper can make your space look newly renovated and fresh.A fresh coat of paint is a budget-friendly way to update any room in your home, according to Hakim. "Our go-to shades are neutral tones such as taupe and greige," Hakim said. "A deeper shade can be used to create an easy accent wall for a dramatic statement that instantly adds depth." You can also consider painting the ceiling as the fifth wall of a room, Fernandez suggested. He said you can also try using wallpaper instead. This will bring a dramatic change to the room, hide ceiling imperfections, add great color, and allow you to select a higher-end wall covering since there's less space to cover, he explained. Elevate the look of old furniture by switching out the hardware.A simple yet effective way to dramatically change the appearance of your furniture, such as cabinets and dressers, is by updating the knobs and handles, said Hakim. If you're trying to upgrade your kitchen and make it feel warmer, Fernandez said he recommends using brushed brass or copper hardware. Give your chairs a more lavish look with luxurious fabrics or paint.The right paint and fabric can transform and elevate the look of the seating in any room, according to Fernandez. Choose a glossy, bold shade that coordinates with your room's existing color palette to paint your chairs, he suggested, and then find a fabric for the seat upholstery. "Pick a fabric that incorporates the selected paint color as well as the colors found in the room," Fernandez told Insider. "Don't be afraid to introduce an unexpected color — you'll be delighted with the elevated look it creates." He said that, since you'll only need a little bit of fabric for this transformation, you can splurge on a high-end, luxe, or designer one. Hang floor-to-ceiling drapes if you want to add a sense of luxury to your space.Curtains and drapes really make a space look finished, Hakim told Insider. Hanging curtains from the ceiling helps to enhance the visual height of a space by drawing the eye upward. Opt for a light, sheer fabric to increase the amount of natural light, she added. "To achieve this look you don't have to have custom curtains made — buy panels that are longer than you need and trim them from the bottom," she said. Small, bold accessories don't have to be expensive, and they can make a major impact."When selecting accessories, be sure to pick ones that will stand out, not necessarily blend in. Introduce a grand, gold antique, such as a mirror to display over an entrance console table," Fernandez told Insider. Other impactful accessories to include are lamps, antiques, decorative boxes, fresh flowers, and coffee table books, he added. Give worn and outdated cabinets a fresh coat of paint to make them look new.A sure way to give your home's kitchen and bathroom a fresh, new look is to refinish your cabinets with paint, Fernandez said.
This will likely cost you under $500 versus over $5,000, which is about the average cost of installing brand new cabinets, according to Hakim. You don't need to spend money to freshen up your space. To figure out how, Insider asked three interior designers for their best tips on sprucing up a room without spending any money. Here's how you can upgrade your home without buying anything new: First off, decluttering your space can make a huge difference.Javier Gonzales, an interior designer at Hometown Designs, said decluttering would change the look and feel of any room. "Look at your dining room," he said. "Is the dining table stocked high with mail and projects that you had planned to get to? Well, there's no time like the present to clear and organize it." Give the carpets in your home a deep, thorough clean.Washing your carpets is another free way to spruce up your space, Courtney Turk, the owner of and interior designer at Courtney Turk Interiors, told Bay Area Entertainer. "Get your hands dirty and scrub your rugs," Turk said. "By giving your rugs a deep clean, it will refresh your home and also help to prolong the life of your carpet as well." Rearrange some items you already have and turn them into decorative, or useful, accents.Once you've decluttered, consider adding streamlined accents. These types of carefully curated accents can accentuate a room while keeping the space clean and uncluttered, according to Christina Nielsen, an interior designer at Christina Nielsen Design. Nielsen suggested placing a bowl of fruit or a stack of lemons on top of some cookbooks in your kitchen or adding a small plant or floral arrangement in your entryway. These accents can be practical, too. "If you have a console table in the foyer, make sure everything is easily accessible," she said. "Create a spot for your keys — I love leaving a little dish out for this." Organize your bookshelves and try sorting them by color or separating them with pretty knickknacks.If you have shelves that are filled with books, try displaying them in a more untraditional way, Turk suggested. "Stack them on top of one another, and add in a few favorite pictures or vases you may have stored away to create some depth and character on the shelf," she told Insider. You can also place books of similar colors together and try to create variations to display them, she suggested. Go "shopping" in your home to find items you may not be using or could be displaying somewhere else.Sometimes the best "shopping" is quite literally done in your own home, Fernandez said.
"Check the attic, storage room, and closets. You'll likely find something you put away a while ago," he told Insider. "Now, with fresh eyes, you can see how it might work in one of your rooms." For example, he said, a den or a living room can be easily transformed if you hang up different curtains or change the wattage on your light bulbs to create mood lighting. Make time this spring to clear out and organize your garage.
Items will be easier to find, you’ll gain more space for your car, and best of all, you’ll be getting rid of things you don’t want or need anymore. That said, we know that for many homeowners this can feel daunting, especially if you’ve accumulated a lot of items over the years. This is why we produced an easy-to-follow, 6-step checklist for you. Step 1: Establish a Plan
This step is pretty self-explanatory. Empty the garage so that you see what is in there and take an inventory of all items. Step 3: Sort Your Stuff Once everything is outside, sort things into four piles:
Take advantage of an empty garage by cleaning floors, walls, and overhead spaces. If needed, you can repaint or repair areas. Lastly, use this time to check and service your garage door equipment, including the opener, sensors, springs, and light bulbs. Step 5: Store Items That You’re Keeping With the items you’re holding onto, it’s time to place them back in the garage.
For the remaining items, you’ll need to:
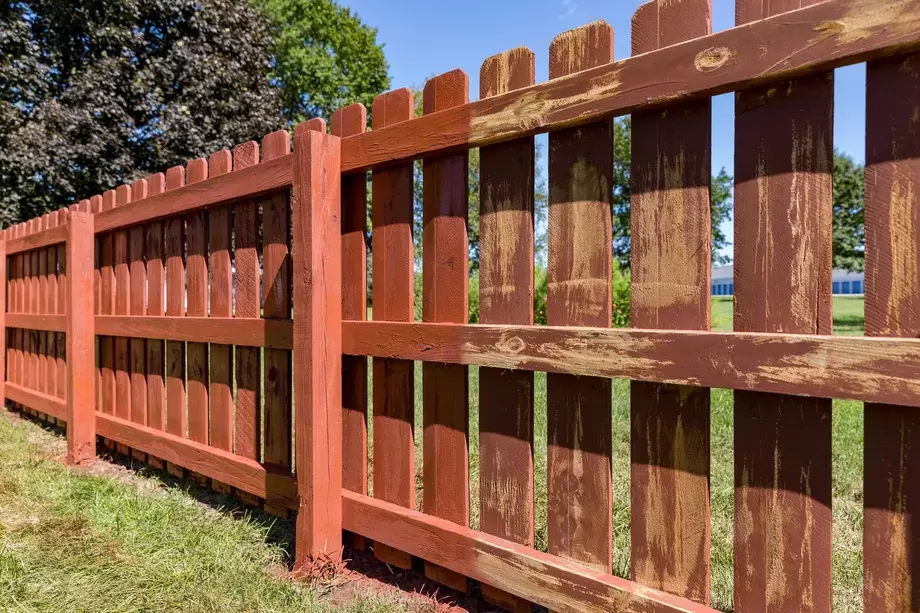
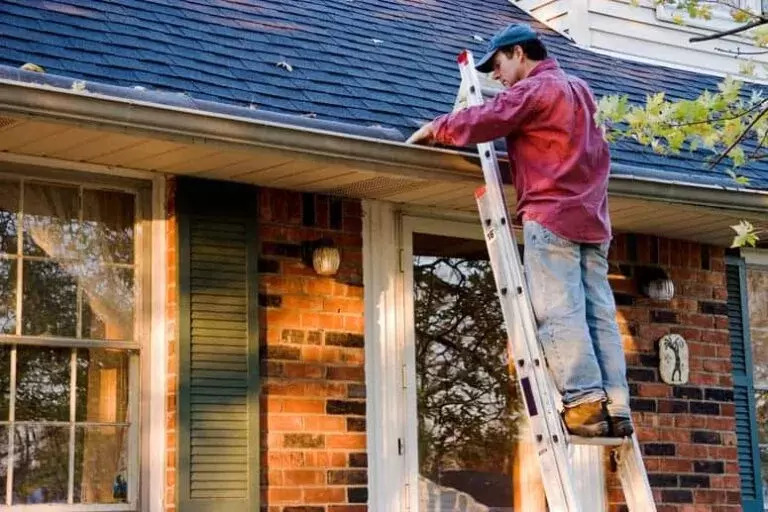
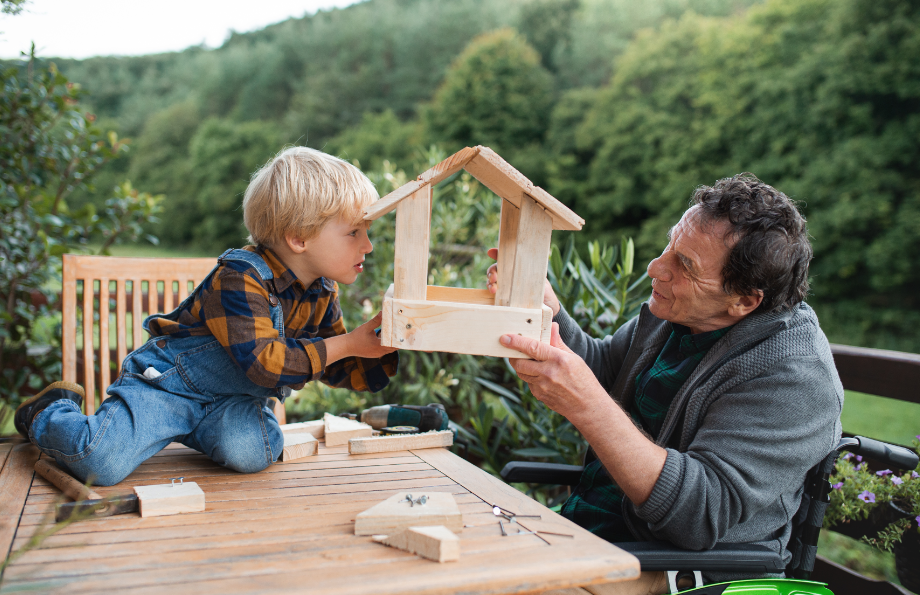
As your yard comes out of winter hibernation you will be able to easily see areas that need some help. Assessing your fence each spring can help you identify problems that have been exacerbated by the winter. If you find that your fence is beyond repair, consider springtime to have new fencing installed. Here are some of the best spring fence installation reasons to replace your old fence. Obviously, the Weather No one wants to put in a fence in the winter! When spring finally comes around, you will be ready to address your outdoor landscaping. Waiting until the ground warms will also make the job easier; if the ground is still frozen, digging holes for the posts will be much more difficult. Beating the Crowd Summer tends to be the busiest time for landscape contractors. Get ahead of the rush by scheduling your fence installation early in the spring. Once the weather has really warmed up, everyone will be clamoring to have their fence replaced! Additionally, areas that are very humid in the summer can lead to problems with installation, so schedule your fence installation in the spring! Being Beautiful by Summer Everyone wants their yard to be in top shape by the time summer rolls around. Installing your fence in the spring will let you enjoy it all summer long. After your fence is replaced, you can move on to other fun landscaping projects. Keeping Children and Pets Safe Choosing to address your fence in the spring is a smart move if you have children or pets. If your old fence becomes unsafe or unusable during the summer you may have no place for your children or pets to play that is fenced. Keeping your children or pets inside during the summer due to a lack of fencing is something you definitely want to avoid! Improving Access to Your Yard If you have found that your old fence doesn’t have the best layout or access, springtime is a great time to reassess. Adding gates to improve backyard accessibility, moving your fence to accommodate landscaping, or closing off unused gates or opening can all make your fence more functional. Keeping Your Yard Secure Summertime is when bikes, scooters, toys and other items may be left out in your yard. Making sure your old fence is replaced in the spring will ensure that your belongings are secured during the times they are out the most. Allowing for New Plants to Grow Install your fence early in the spring, and you can plant around it for a lush yard in the summer and fall. If you wait too long to install your fence you may end up having to damage mature plants to access the area. With the arrival of spring and the warm, fresh air, it's time to throw open your windows and dust off the dregs of winter. The change of seasons is the perfect time to evaluate all the home improvement projects you’ve been putting off and get down to the business of planning. Add these spring home projects to your to-do list as you get your house in order after a long winter. 1. Replace or Clean Your Gutters You’ll want to clean your gutters twice a year: when the leaves have fallen at the end of autumn and again in the spring before the rainy season. Gutter maintenance keeps leaves, dirt, and debris from building up on your roof and clogging the gutters. Clogs can cause water to overflow and damage the metal, as well as trap moisture against your roof and siding. If the build-up is minimal, you should be able to clean your gutters on your own with just a ladder, rubber gloves, and some elbow grease. Tricky rooflines or multi-story buildings make this job more than an average DIY project, in which case you’ll want to hire a local gutter cleaning service. If the metal is bent or otherwise compromised by age and rust, you’ll want to replace your gutters entirely. This is a convenient opportunity to upgrade to deeper gutters and change the color of a primary architectural feature. Contractors typically use sheet metal extrusion rigs to create a seamless look on long runs that is a popular upgrade from older, fitted gutters—or, if you really want to get fancy, you can replace the gutters with copper. You may also want to add gutter guards, which can help cut back on cleaning requirements. 2. Power-Wash Your Driveway Removing grime from concrete provides instant gratification and dramatically enhances your home’s curb appeal. Pressure-washing is relatively straightforward if you have an equipment rental company nearby: For larger surface areas, you’ll want to rent a heavy-duty power-washing rig that attaches to a pushable rotary swivel bar mounted on wheels. These pressure washer add-ons completely change the game for how much labor it requires to evenly clean the surface and make even a large driveway doable in a day. If you have a more basic power washer model, the pressure probably won’t be strong enough to drive a rotary attachment, in which case you’ll need to manually clean your driveway inch by inch—something that can be as therapeutic as mowing the lawn or as frustrating as picking up sticks. This method is best for smaller driveways or difficult walkways that won’t allow the smooth movement of the rotary tool. Once the concrete is crisp and clean, seal it with a good concrete sealer to help prevent the immediate return of mold and dirt. While sealing the concrete isn’t necessary for the overall health of the surface, it does create a more finished look and helps all of your hard work last a little longer. 3. Stain Your Deck After power-washing is complete, it’s time to evaluate the status of your deck. If it’s been more than three years since you have sealed it, it’s likely time to add another coat of paint or stain for preventative maintenance. If there’s flaking or peeling, you’ll want to address that immediately with a power-washer or sander to stop the deterioration from spreading deeper into the wood. Before you stain your deck, make sure there are no loose boards you need to replace, and clean well between any boards that touch each other, as this is a common starting point for fungal growth and wood rot. Once you’ve properly prepared the surface for a fresh coat of sealer, pick a dry weekend to work and apply two coats if possible. 4. Clean Your Windows Keeping your windows clean can be a full-time job, and it’s easy to neglect this part of your home once you’ve gotten used to the thin haze of grime that accumulates over time. Take a rag and some glass cleaner to the insides of your windows, and buy a good squeegee and sponge set-up that the professionals use for cleaning the exterior portions of the glass. If you live in a multi-story house, you might want to call a window-cleaning company to get the higher spots you can’t safely reach from the ground. 5. Trim Your Trees A strong storm can easily shake out large limbs from trees surrounding your home, so you may want to remove overhanging branches or rotted pieces of wood from your yard. Caring for your trees is a good habit to get into at the start of every season, particularly in early spring, which is also the onset of tornado and hurricane season in many parts of the country. Get a leg up on trimming all the dead branches and twigs before high winds bring them down. If you don’t have the proper knowledge or equipment to reach the tough spots, you’ll want to call a local tree service to help. 1. The best projects are not necessarily the sexiest “Upgrades like electrical and plumbing can improve the safety and efficiency of a home, while incorporating storage space into a reno is always a great investment,” says Spear. “However, structural issues and waterproofing should always be at the top of the list before any other projects get started. There’s no sense in putting in a new bathroom on a crooked floor, or have your new room damaged by a leaking foundation or roof.” 2. Make the most of your outdoor projects by starting in early spring Upgrades like building a deck or resurfacing an existing one are popular improvement projects in the spring. “Winter weather can be hard on a deck surface, so refinishing in the spring allows you to enjoy the deck all summer long,” says Spear. You may also want to consider a landscaping project for your front or backyard. “Upgrading the exterior with hardscape materials like stone and interlocking brick creates an instant visual appeal,” says Spear. “Adding shrubs or trees also breaks up the linear lines of the exterior and creates visual interest with texture and color.” 3. Get your contractor and materials booked well in advance All home renovation projects involve multiple stages and lots of time so the earlier you start planning, the more prepared you’ll be. “It takes time to secure a contractor or project manager, source materials and design spaces which means planning should start months prior,” says Spear. “If a project requires permits, they will have to be submitted and approved before building begins. Building inspectors will also be required to sign off on certain stages of a project before the next stage can begin — which all takes time.” 4. Don’t become a home reno horror story When you put your home into someone else’s hands, you want to make sure they’re reliable and qualified to do the job right. We’ve all heard the horror stories of bad contractors who go MIA, take shortcuts or charge double the original estimate. “There are a lot of great contractors out there, but there are some that can overcharge you for substandard results,” says Spear. “Be sure to shop around for contractors, ask for references and do your research before signing anything or handing over any money.” While you’re planning for your renovation project, don’t forget to establish a contingency fund to cover unexpected issues and costs. “Newer homes may have fewer issues but they are not exempt, and older homes are guaranteed to have issues that will set you back or change your course of action, so be prepared and don’t be shocked when they arise.” 5. Consider your project’s return on investment both in monetary return and enjoyment When talking home renovation, a key factor to keep in mind is its return on investment. Even if you’re not planning on selling your home in the near future, you’ll want to consider how a renovation project may affect your home’s value. “Kitchen and bathroom renovations always top the list for popular home improvement projects that offer the best ROI,” says Spear. “Also, adding insulation to areas with limited or non-existent insulation is always a good investment since making your home as energy efficient as possible helps keeps more money in your pocket.” You don’t just have to tear down walls or build an addition to yield big returns. Small upgrades in design and decor can make your home more functional, welcoming and comfortable. It adds to your enjoyment of the space and that’s valuable too. “Updating plumbing fixtures, light fixtures and even door/cabinet hardware can drastically improve the look of a room,” suggests Spear. “Updating outdated or worn flooring can also have a great return on investment, as it too can drastically improve the look and feel of a room.” 6. Limited budgets don’t always mean small-scale reno projects There are plenty of home renovation projects you can start even if you’re working with a smaller budget. Consider tasks like applying a fresh coat of paint, installing new mouldings, changing a kitchen backsplash, refacing cabinets or upgrading doors, knobs and hardware. “If you’re willing to tackle it yourself, money saved on hiring the project out can be used to buy nicer finishes and better-quality materials,” says Spear. “Just be sure you’ve done your research, know what you’re doing, and the project doesn’t require a licensed trade to perform.” At the first signs of spring, it pays to get busy with home repairs and improvements. Don’t wait for summer to arrive. You can save money, time, and hassle by starting those projects now. Why is it important to start now? For starters, once summer arrives, you’ll be in line behind everyone else who is doing a home improvement project. Contractors will be swamped. This means longer waits and higher rates. Do-it-yourselfers will jamb home improvement centers. And you will be up against a deadline to complete your projects. If they run longer than expected, they can ruin your vacation plans. Instead, if you get a head start, you can gather competitive bids from contractors who are hungry for work. You can miss the crowded aisles of the home improvement center. And you can take the time you need to accomplish your project. In addition, you can handle problems while they’re fresh, before they get worse. Last but not least, doing home improvement projects now gets your home in shape for the summer recreation and entertaining you’d rather be enjoying then. Following are 9 summer home repair and improvement projects you can—and should—jump on early: Repair Winter Storm Damage During mild spring days, take stock of storm and water damage to your home. Most houses sustain at least a few problems during the winter months. Investigate and make the repairs now, before starting on any larger remodeling or warm-weather projects. By attacking necessary repairs now, small problems don’t become big ones. Don’t wait to address a leaking roof or damp basement or crawlspace. Ultimately, chronic moisture or water damage can cause mold and rot. To hire someone who can do these jobs, call roofing or siding contractors, a waterproofing contractor or a general contractor. Missing or damaged roofing. Look for trouble spots on the roof—but only in good weather and only if you can do so safely. You can also go into the attic with a bright flashlight to check for signs of moisture. But be careful! Once in the attic, step only on attic floorboards or secure framing members—never on the insulation or the topside of the ceiling below because neither will support your body weight. Look for pinpoints of daylight showing through (though on a wood-shingle roof you’ll probably see many such places, but these tend not to leak because they’re protected by the shingles’ overlap). For more, see How to Find & Fix a Roof Leak. Many serious roof leaks are not caused by missing or damaged shingles but rather by broken or improperly installed roof flashing. Repair or replace flashing as needed. See How to Repair Roof Flashing. Water-stained ceilings. Following a roof leak, there is usually a yellow or brown stain on the ceiling below. After you’ve fixed the roof leak, a stain will probably show through if you just paint over it. Instead, first seal the stain with a shellac-based stain sealer. Then you can touch-up or repaint the ceiling. Flooded basement or crawlspace. Keeping under-house spaces dry protects against dry rot, prevents moist air from being drawn up into the living space, and arrests the growth of mold. Depending on what you find when you check the basement or crawlspace, you may need to install a sump pump. Check out the Sump Pumps Buying Guide. (StatePoint) Part of being a good environmental steward is passing on this wisdom to the next generation. Here are three hands-on ways parents and grandparents can teach children to protect the birds in their very own backyard. Build a Bird Feeder Build bird feeders using natural or recycled materials to teach two earth-friendly lessons in one: the importance of reducing waste and the need to take care of local wildlife. Bird feeders can be crafted from milk cartons, tin cans, mason jars or even natural materials like pinecones. As you decorate your bird feeders, talk to your kids about how birds are not just beautiful, but also a vital part of the ecosystem and how you are offering these creatures a chance to rest and refuel. Fill your finished products with birdseed and choose a safe spot to hang them. Experts recommend bird feeders be positioned either closer than three feet or farther than 30 feet from windows. Protect Flight Birds in flight are prone to strike windows. Fortunately, there’s an easy home project you and your children can complete together that will help prevent this from happening. Applying decals that reflect ultraviolet sunlight to your home’s windows, particularly windows that are highly reflective of open sky, has been proven to substantially reduce the likelihood of bird strikes. Those from WindowAlert feature patterns that give the appearance of slightly frosted translucent glass, but glow like a stoplight for birds. Kids can help select from fun decal designs like snowflakes, butterflies and maple leaves. The brand also makes a high-tech UV liquid that offers even greater protection when applied between decals. To learn more, visit WindowAlert.com. Keep a Log Now that you’ve invited birds to your yard and have taken steps to protect them, inspire young naturalists to keep a log of flying visitors. Kids can draw pictures of the birds they see and note their observations. Visit Audubon for Kids at audubon.org for a birding guide, activities, games and additional projects that can help kids learn to identify various bird species by sight and sound. “Environmental stewardship starts in your own backyard and people of all ages can get involved, including kids,” says Spencer Schock, founder of WindowAlert. “The good news is that turning your home into a refuge for birds is fun, easy, and something parents, grandparents and kids can work on together.” ----------------------------------------------- ----------------------------------------------- PHOTO SOURCE: (c) Halfpoint / iStock via Getty Images Plus PHOTO CAPTION: (StatePoint) Tax season is in full swing, and the IRS has processed and delivered more than $1 billion in refunds so far this year. Whether you’re receiving a tax refund or not, now may be the perfect time to spring clean your personal finances. Here are a few ways to get started: • Save those extra funds: Studies show the latest tax refund trends are using the influx towards paying down debt and setting it aside to save up for large purchases like a car or home. To get in on the trend, start by tracking your monthly expenses and categorizing each expense as a want or a need. Avoid using a credit card if you are unable to pay the balance each month to avoid interest charges, and make a plan to pay off any outstanding debt. Financial experts recommend having an emergency fund covering three to six months of living expenses if you can. If not, start with an emergency fund goal of $1,000. • Get invested: Investing can be the best way to grow your financial portfolio. According to a recent study from MagnifyMoney, more than three-quarters of millennials wish they would have started investing earlier. The main factors that respondents cited preventing them from investing are lack of knowledge, feeling intimidated and feeling overwhelmed about where to start. There is hope and help – many financial institutions offer free online workshops and opportunities to work with an advisor to help guide you through your financial future. • Reassess monthly bills and spending habits: Now is a great time to review your monthly expenses and see what you can adjust or live without. Simple changes like cutting down on eating out or canceling subscriptions you don’t use can have a large impact. Shopping around for homeowner’s or car insurance is also a great way to secure some extra savings. Phone plans and home internet bills are other must-have services to shop for price comparisons and savings. T-Mobile offers rate plan discounts for first responders, active-duty military and military veterans, and those ages 55 and up. T-Mobile also offers 5G Home Internet – available to more than 30 million households nationwide – for just $50 per month with Auto Pay. And, you don’t have to be a T-Mobile wireless customer to take advantage of the service. • Treat yourself: Spoiling yourself from time to time is not a bad thing, in fact, studies from the American Psychological Association have shown it to be a good boost to your overall mental health. Consider using a portion of your refund to upgrade your smartphone, take a trip to a new destination, treat someone special in your life or donate to one of your favorite organizations, because you only live once. However you plan to use your tax refund or set finance goals this year, make a plan and stay consistent. ***** ----------------------------------------------- ----------------------------------------------- PHOTO SOURCE: (c) fizkes / iStock via Getty Images Plus PHOTO CAPTION: |











 RSS Feed