|
Roasted Root Vegetables This easy side dish will be a sleeper hit on your Thanksgiving table. The medley of roasted sweet potatoes and humble root veggies looks unassuming, but it’s incredibly flavorful, drizzled with an infused sage oil and topped with crispy sage leaves. 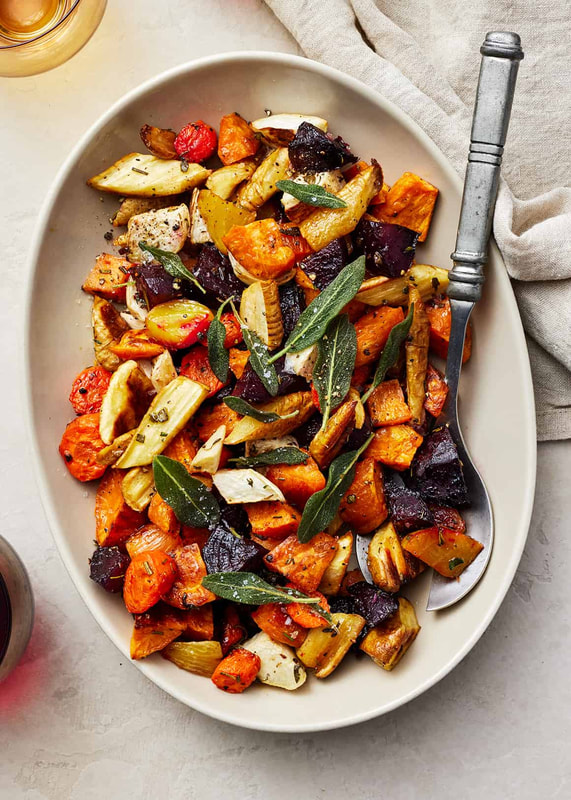 This oven roasted root vegetables recipe elevates humble carrots, parsnips, turnips, sweet potatoes, and beets into a holiday-worthy side dish. I know these unassuming vegetables might not be the first ones you reach for at the farmers market or grocery store, but there are so many reasons to cook them. They’re nutritious and affordable. They’re colorful, and–best of all–they’re delicious. In this roasted root vegetables recipe, I chop them into big chunks and toss them with olive oil, salt, pepper, and lots of fresh herbs. Then, I roast them until they’re tender and caramelized. When they come out of the oven, I drizzle them with a fragrant sage oil, which makes their rich, earthy flavor that much richer and that much earthier. And, as a final finishing touch, I sprinkle them with fried sage leaves, which offer a great crispy contrast to the tender roasted veg. You might not imagine yourself going back for a second helping of roasted root vegetables at a holiday dinner, but try this recipe, and I promise that you will. Roasted Root Vegetables Recipe Ingredients Here’s what you’ll need to make this roasted root vegetables recipe:
Roasted Root Vegetables Recipe Tips
How to Serve Roasted Root Vegetables I developed this roasted veggies recipe with holidays like Thanksgiving and Christmas in mind, but this healthy side dish would be at home at any fall or winter meal. Pair it with your favorite protein for a satisfying weeknight dinner, or serve it alongside mushroom polenta, stuffed shells, or butternut squash risotto for a comforting weekend feast.  Call the Overall Plumber for Your Houston Plumbing Service Emergency
We sympathize with you when a plumbing emergency happens as we know how it does affect you and your family. We know how damage from a plumbing issue can have an impact on other parts of your home or business as well. Call The Plumber and let us come to your rescue.service@theoverallplumber.com theoverallplumber.com 13733 Highway 6, Santa Fe, TX 1 281-668-8055
0 Comments
Traditional Baked Sweet Potato Good Thanksgiving recipes don’t have to be complicated! With crispy skins and smooth, sweet flesh, these easy baked sweet potatoes would be a delicious addition to your Thanksgiving menu. 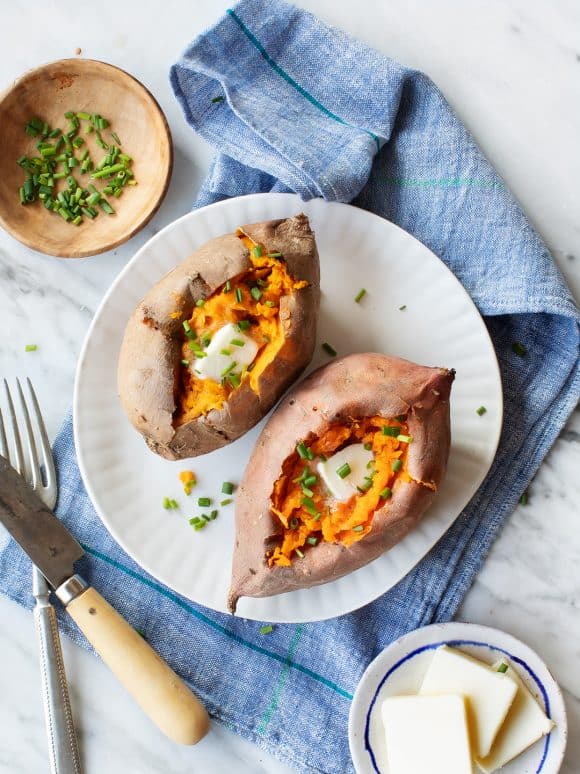 How to Bake Sweet Potatoes For a long time, I thought I didn’t like sweet potatoes. When I was growing up, I only ever had them in casserole form, smothered in marshmallows and brown sugar. Turns out, I love sweet potatoes, but I have to prepare them the right way! I like mine puffy, with caramelized edges and a crispy skin. Here’s how I make them:
If you do, the sweet potato flesh will still cook, but the skin will be very moist and almost slimy. In order to get delectable, puffed up crispy skin and caramelization on the outside of each baked potato, place them onto the baking sheet bare! If you’re in a hurry, you can also roast sweet potato halves for 30 minutes. Slice the potatoes in half lengthwise, rub them with olive oil, sprinkle with salt and pepper, and cook cut-side up until lightly browned and tender. Oven Baked Sweet Potato RecipesOf course, a perfect baked sweet potato with butter, salt, pepper, and a sprinkle of chives is great, but your options for baked sweet potato recipes don’t end there. To make one into a full meal, I like to stuff it with a flavorful veggie filling and a yummy sauce. Find my 4 favorite fillings for stuffed sweet potatoes here, or click the picture below. If you’re serving your oven baked sweet potatoes as a side dish, pair them with your favorite protein or vegetarian chili. For a topping, stick to butter, Greek yogurt, or sour cream, or try adding a dollop of cilantro lime dressing, tzatziki, chipotle sauce, pesto, guacamole, or a drizzle of tahini sauce. If you have leftover baked sweet potatoes, save the soft flesh for another recipe. I blend it into the frosting of my vegan chocolate cake, transform it into a luscious Alfredo sauce, use it to bind quesadillas, or mix it into hummus! Do you have any favorite baked sweet potato recipes? Let me know in the comments!  On The Way A/C, Plumbing, & Electrical
Ronnie Bedard We proudly serve our community with top-quality plumbing, electrical, and HVAC services in Santa Fe, TX. With the experienced team at On The Way handling your needs, you can sit back and relax knowing that all your repairs will be done quickly and efficiently. We pride ourselves on a high standard of excellence, over 20 years of experience, and a long list of happy customers. Our repairs and services keep the Santa Fe and Galveston County communities comfortable and safe daily. Schedule service with us today! www.onthewayprossantafe.com onthewaypros@yahoo.com (409) 945-7202 #memes.#socialmedia.#like.#photooftheday. #facebookmarketing.#trending Mashed Sweet Potatoes No matter who you're serving, these mashed sweet potatoes are guaranteed to be a hit! They're smooth, creamy, and full of sweet and savory flavor. 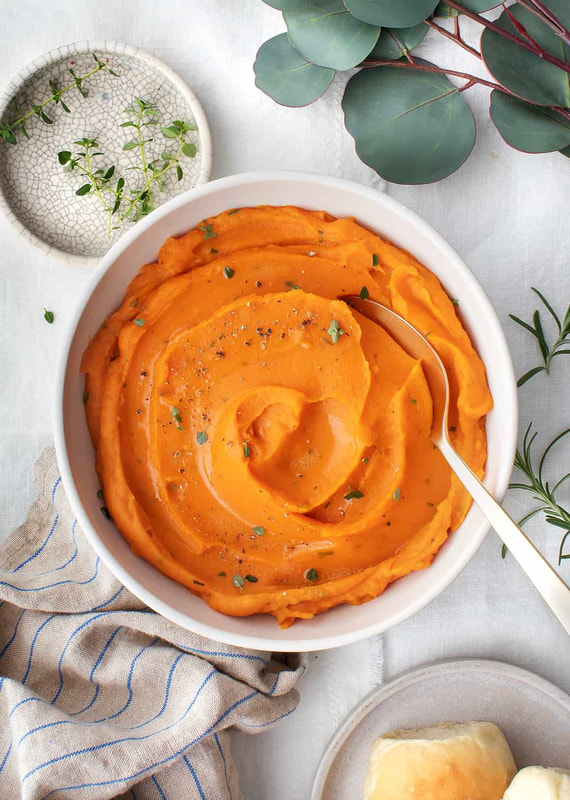 Mashed Sweet Potatoes Recipe IngredientsMy favorite thing about this recipe is that it really lets the sweet potatoes shine. Unlike in a sweet potato casserole or some other mashed sweet potatoes recipes, you won’t find any marshmallows, brown sugar, or maple syrup here. The sweetness comes from the potatoes themselves. Then, these ingredients add richness and depth of flavor:
How to Make Mashed Sweet PotatoesLike in my mashed cauliflower recipe, I don’t actually mash the sweet potatoes here. Instead, I puree them in a food processor to achieve a super smooth, creamy texture. If your desired consistency is chunkier, feel free to use a potato masher instead, but I adore this method: First, bake the potatoes. When I make traditional mashed potatoes, I boil the potatoes in a large pot (or cook them in the Instant Pot). But when I’m working with sweet potatoes, I bake them. It concentrates their natural sweetness and makes their flesh smooth and creamy…perfect for mashed sweet potatoes! Wash the potatoes, and poke a few holes in them with a fork. Place them on a foil-lined baking sheet and bake at 425°F for 60 minutes, or until tender. You should be able to easily pierce them with a fork. Next, blend! When the potatoes are cool enough to handle, peel away their skins. Transfer the cooked flesh to a food processor, along with the butter or oil, rosemary, garlic, ginger, salt, and pepper. Pour in the milk, and process until the mixture is creamy. Season to taste. Finally, eat. Serve the mashed sweet potatoes hot, topped with a sprinkle of fresh parsley or thyme, a pat of butter, and salt and pepper. Enjoy! These mashed sweet potatoes keep well in an airtight container in the refrigerator for up to 3 days. Pop them in the microwave to reheat!  Del Bosque Plumbing, LLC
WE SPECIALIZE IN RESIDENTIAL AND COMMERCIAL INSTALLS AND REPAIRS. BACKFLOW SERVICES SPECIALIZING IN THE TESTING, AND REPORTING OF VARIOUS BACKFLOW ASSEMBLIES. LOCALLY OWNED AND OPERATED WITH OVER 25 YEARS OF EXPERIENCE. (409) 934-4129 #PLUMBING #DELBOSQUEPLUMBING #galvestoncounty #smallbusiness #tacos #shoplocal #eatlocal #community #friends #mycuprunnethover #blessed #memes.#socialmedia.#like.#photooftheday. #facebookmarketing.#trending Cauliflower Mashed Potatoes If you’re a fan of creamy mashed potatoes, you’ll love this recipe! You can’t taste the cauliflower, but it makes these mashed potatoes extra fluffy, smooth, and light. 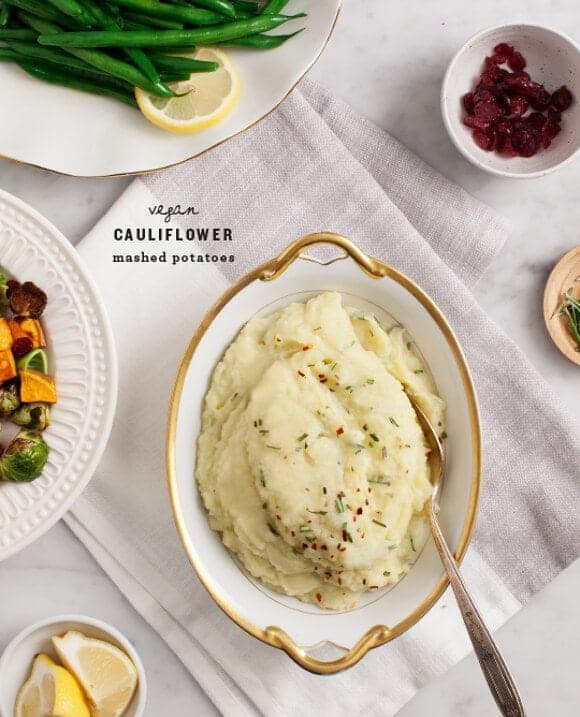 How to Make Cauliflower Mashed PotatoesWe only used 7 ingredients in this cauliflower mashed potatoes recipe: garlic, potatoes, cauliflower, olive oil, salt, pepper, and rosemary. We ended up making some of the smoothest, lightest clouds of mashed potatoes ever. In spite of the lack of “butter lake,” I’m officially a convert. Here’s what we did:
What to Serve with Cauliflower Mashed PotatoesThis mashed cauliflower is an excellent addition to a holiday spread. Here are some of our favorite fall and winter dishes to pair with it:  Mosquito Shield of Southeast Houston
We provide mosquito prevention services from Deer Park, TX all the way down to the far West End of Galveston, TX and from Alvin, TX all the way to Kemah, TX. We are committed to providing a superior mosquito prevention experience to all of our customers and in doing so making our customers outdoor lives more enjoyable! The difference between Mosquito Shield and all of the other mosquito prevention providers out there is the fact that we monitor the weather in our region and service your property every 10-17 days, not once a month like our competitors. We do not require a contract and you can cancel service at anytime. We also offer a 100% money back guarantee! And with our customer referral program if you get 3 people to sign up under your referral then your entire next season is on us! Santa Fe, TX, United States, Texas 1 281-763-7231 moshield.com info@mosquitoshieldsehtx.com #mosquitoshield#memes.#socialmedia.#like.#photooftheday. #facebookmarketing.#trending #Bolivar #southernliving #galveston Instant Pot Mashed Potatoes These Instant Pot mashed potatoes are rich, buttery, smooth, and creamy. Made with just 5 ingredients, they're such an easy, delicious side dish. 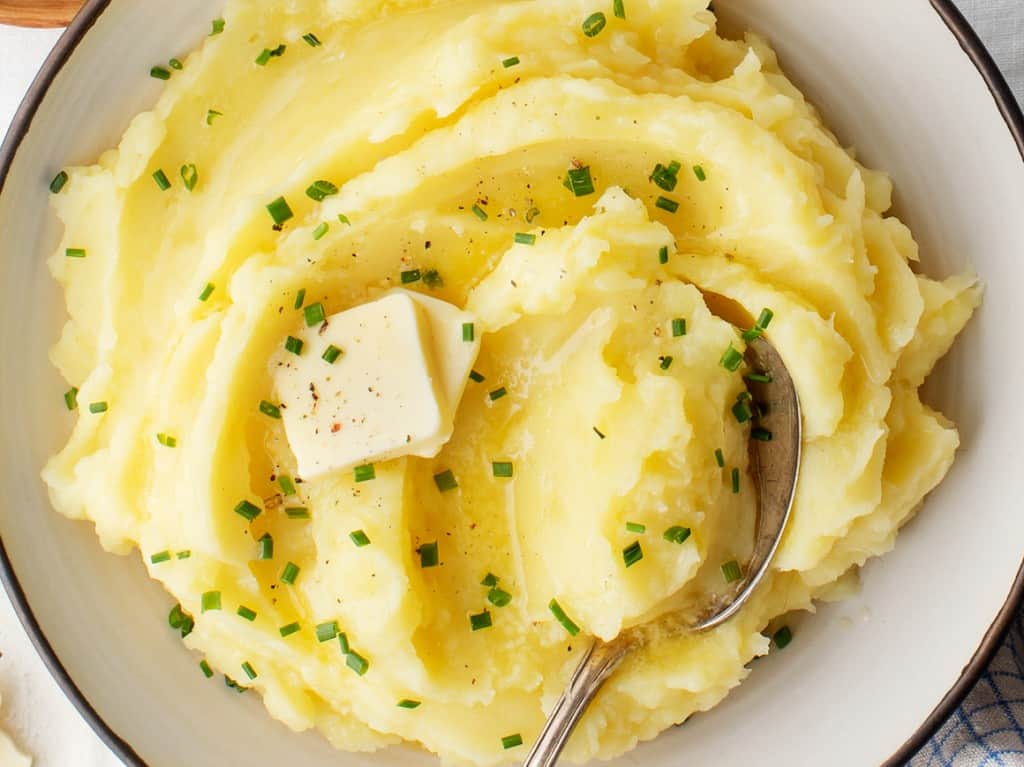 Instant Pot Mashed Potatoes Recipe IngredientsHere’s what you’ll need to make this Instant Pot mashed potatoes recipe:
How to Make Mashed Potatoes in the Instant PotThis recipe is so easy to make! Here’s how it goes: First, prep the potatoes. Scrub them, peel them, and cut them into large chunks. Aim to cut the potatoes to roughly the same size so that they cook evenly in the Instant Pot. Pile the chopped potatoes into the Instant Pot… …pour in water to cover, and stir in 2 teaspoons of salt. Then, cook! Secure the lid on the Instant Pot and set the steam release handle or switch to the sealing position. Pressure cook on High Pressure for 12 minutes. Quick release the pressure and remove the lid. Important: Make sure to reserve 3/4 cup of the cooking water before you drain the potatoes! Drain the potatoes… …return them to the pot, and mash! Add the garlic, olive oil, butter, and remaining salt and continue mashing to fully incorporate them with the potatoes. Finally, add the cooking water. Fold in 1/4 cup at a time until the mash is smooth and creamy. Season to taste with salt and pepper, and serve! Instant Pot Mashed Potatoes Serving SuggestionsThese Instant Pot mashed potatoes would be a great side dish for any fall or winter meal, but I think they’re especially perfect for Thanksgiving. Cooking them in the Instant Pot clears up some space on the stove for your sautéed Brussels sprouts, cranberry sauce, or whatever other Thanksgiving side dishes you might be making. And if you can’t get to the potatoes right away, they can hang out on the Instant Pot’s Keep Warm setting until you can. How handy is that?! When you’re ready to serve, top them off with fresh chives, black pepper, and a big pat of butter (or vegan butter). They’d also be fantastic with a ladle of my mushroom gravy. If you have leftovers, store them in the fridge for up to 3 days. They reheat surprisingly well in the microwave. Enjoy!  Roasted Garlic Mashed Potatoes I make these creamy mashed potatoes without any sour cream or butter! They get their luscious texture and rich flavor from olive oil, roasted garlic, and a good splash of starchy potato cooking water. 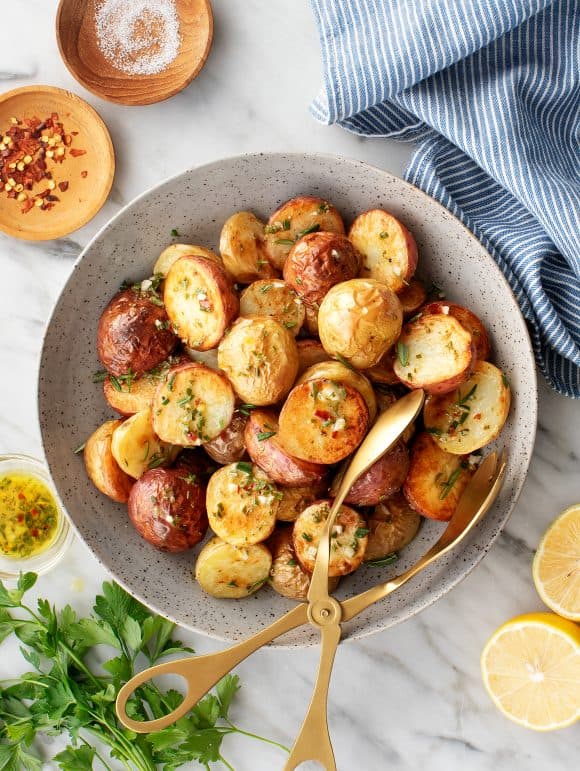 Garlic Mashed Potatoes Recipe IngredientsThe best mashed potatoes only require a few simple ingredients:
How to Make Mashed PotatoesFirst, roast the garlic in a 350-degree oven until the cloves are deeply brown and tender. This could take up to 60 minutes! Tip: You can easily do this step ahead of time. Wrapped in foil, the roasted garlic will keep for 3 days in the fridge. Then, peel the potatoes. If you love creamy mashed potatoes, peeling is a must. Once they’re peeled, there’s no need to cut the potatoes before cooking. Just put them in a large pot, and cover them with 1 inch of cold water. Next, boil them. Add a teaspoon of salt to the pot, and boil until the potatoes are tender. Before you drain the potatoes, don’t forget to reserve 1 cup of the starchy cooking water. Then, it’s time to mash! For the best creamy texture, I rice the potatoes first. Then, I use a regular potato masher to break up any chunks. If you don’t have a potato ricer, that’s ok! Just be sure to mash them thoroughly. Finally, fold everything together. Remove the tender garlic cloves from their paper and mash them into a paste with a fork or small masher. Fold the garlic into the potatoes, along with olive oil, reserved potato cooking water, salt, and pepper. Season to taste and add more cooking water, as needed, to reach your desired consistency. Top with your favorite fixings, and enjoy!  Clark Rotating Equipment Services LLC -
provides rotating equipment services that keep our growing base of petrochemical customers operating smoothly and efficiently. These services include the repair and installation of all types of rotating equipment. Texas Born. Texas Proud. 1100 South Highway 36 Brazoria, Texas 77422 Phone:(979) 647-1090 Fax:(979) 647-1098 https://www.clarkrotating.com/ Roasted Garlic Mashed Potatoes I make these creamy mashed potatoes without any sour cream or butter! They get their luscious texture and rich flavor from olive oil, roasted garlic, and a good splash of starchy potato cooking water. 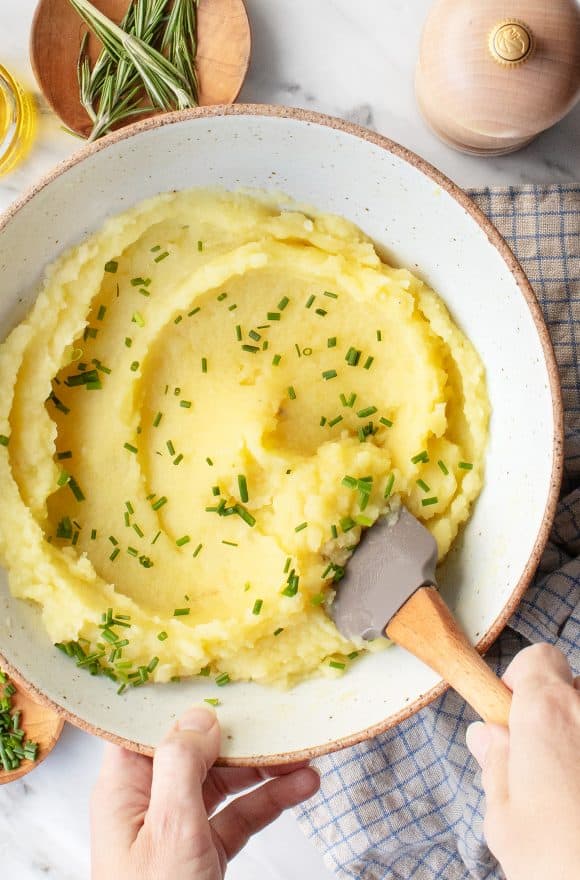 The standard for mashed potatoes is high in our house. See, Jack grew up eating his Uncle Billy’s perfect mashed potatoes, and he still reminisces about them. They were creamy, fluffy, and rich with (lots of) melted butter, (lots of) sour cream, and topped with “butter lake,” as Jack lovingly refers to it. I’ve made mashed potato recipes before, but always with a twist like cauliflower or kale. This year, I stepped up to take on the challenge of making a delicious, classic homemade mashed potato recipe. This mashed potato recipe is not quite the same as his Uncle Billy’s, so I didn’t know what Jack would think. Instead of dairy, olive oil and starchy potato cooking water give these potatoes an amazing creamy texture, and roasted garlic fills them with rich, nutty depth of flavor. I thought they were delicious, but the real test came when we sat down to eat. 0 of 1 minute, 24 seconds, Volume 0% Loading ad Jack’s verdict? “These mashed potatoes are SO good!” Garlic Mashed Potatoes Recipe IngredientsThe best mashed potatoes only require a few simple ingredients:
How to Make Mashed PotatoesFirst, roast the garlic in a 350-degree oven until the cloves are deeply brown and tender. This could take up to 60 minutes! Tip: You can easily do this step ahead of time. Wrapped in foil, the roasted garlic will keep for 3 days in the fridge. Then, peel the potatoes. If you love creamy mashed potatoes, peeling is a must. Once they’re peeled, there’s no need to cut the potatoes before cooking. Just put them in a large pot, and cover them with 1 inch of cold water. Next, boil them. Add a teaspoon of salt to the pot, and boil until the potatoes are tender. Before you drain the potatoes, don’t forget to reserve 1 cup of the starchy cooking water. Then, it’s time to mash! For the best creamy texture, I rice the potatoes first. Then, I use a regular potato masher to break up any chunks. If you don’t have a potato ricer, that’s ok! Just be sure to mash them thoroughly. Finally, fold everything together. Remove the tender garlic cloves from their paper and mash them into a paste with a fork or small masher. Fold the garlic into the potatoes, along with olive oil, reserved potato cooking water, salt, and pepper. Season to taste and add more cooking water, as needed, to reach your desired consistency. Top with your favorite fixings, and enjoy! Roasted Garlic Mashed PotatoesPrep Time: 10 mins Cook Time: 1 hr Total Time: 1 hr 10 mins Serves 4 to 6 Made with olive oil and roasted garlic, these creamy homemade mashed potatoes are one of our favorite side dishes.IngredientsRoasted Garlic*
Mashed Potatoes
 Affordable Air & Heat LLC.
where we are here to meet all of your HVAC needs... We service all of Galveston county & most of Houston... Give us a call today! (409) 925-8275 http://Affordableairtx.com/ #galvestoncounty #smallbusiness #tacos #shoplocal #eatlocal #community#HVAC #GETCOOL #memes.#socialmedia.#like.#photooftheday. #facebookmarketing.#trending #friends #mycuprunnethover #blessed If having cornbread stuffing on your Thanksgiving table is a must, try this recipe for a fun twist11/17/2022 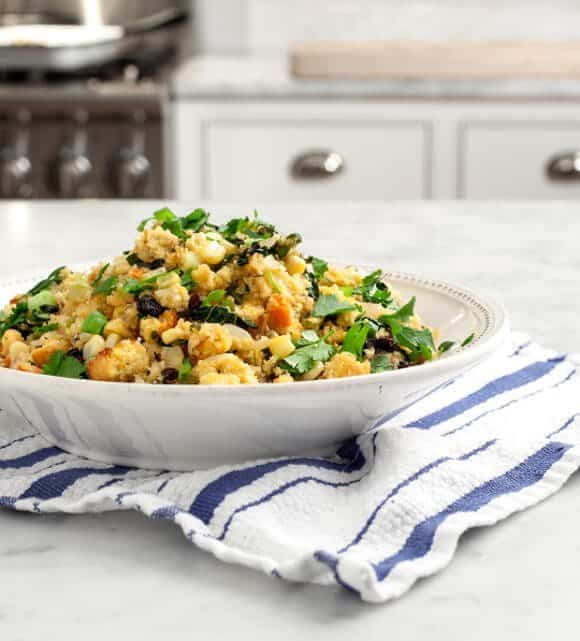 What are your family’s Thanksgiving traditions? We always have a turkey, of course, along with green beans, mashed potatoes, and sweet potatoes. Oh, and there’s always Jello (and not for dessert… it’s “dinner Jello”). But my favorite part is the stuffing. I’m a huge fan of traditional versions made with crusty bread, but this year, I’m changing things up by adding this lightly spicy poblano cornbread stuffing to our Thanksgiving table. What’s in This Cornbread Stuffing Recipe? This homemade cornbread stuffing is a delicious mix of classic stuffing ingredients plus a few extras for a spicy twist:
Homemade Cornbread Stuffing TipsI’ve tested this recipe through and through. In my opinion, these three steps lead to the ultimate cornbread dressing success:
Cornbread Stuffing Recipe VariationsI love this recipe as written – it’s spicy, fresh, and even a little sweet – but feel free to change it up! Here are some suggestions:
Call the Overall Plumber for Your Houston Plumbing Service Emergency
We sympathize with you when a plumbing emergency happens as we know how it does affect you and your family. We know how damage from a plumbing issue can have an impact on other parts of your home or business as well. Call The Plumber and let us come to your rescue.service@theoverallplumber.com theoverallplumber.com 13733 Highway 6, Santa Fe, TX 1 281-668-8055 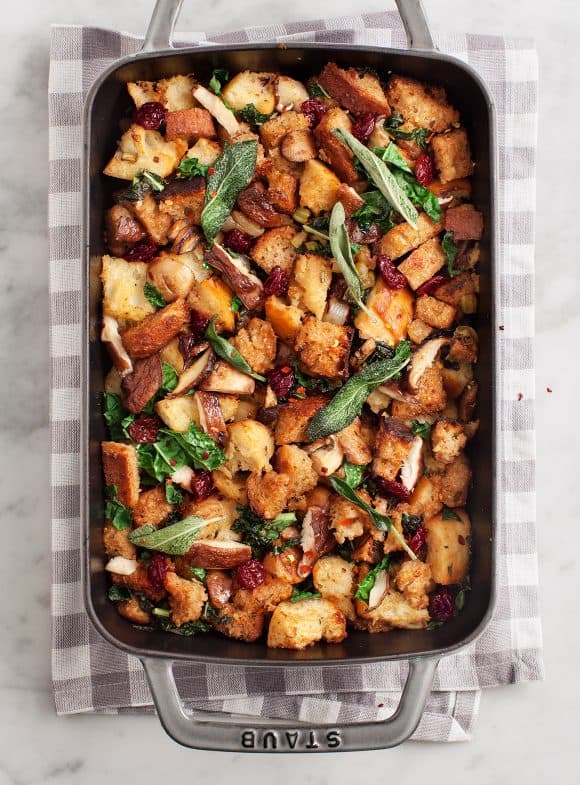 This vegan stuffing recipe is a plant-based version of my mom's classic stuffing recipe. Her stuffing has been my favorite part of Thanksgiving ever since I was a kid. She never makes it from a box, but uses fresh bread, lots of butter, onions, and celery instead. It’s richly flavorful, soft in the middle, and crisp on top, and it’s always the first dish I reach for at Thanksgiving dinner. In this vegan stuffing recipe, I keep the celery, onions, and crusty bread, but I use a generous amount of olive oil instead of butter, which adds robust flavor. Then, I increase the veggies. Along with the onion and celery, I add a hefty amount of shiitake mushrooms, kale, and tons of fresh herbs. Sautéed with a splash of balsamic vinegar, the mushrooms give this stuffing a delicious savory flavor – it took everything I had to resist devouring it straight out of the pan! Traditional stuffing is typically considered a Thanksgiving side dish, but with all these hearty veggies, this vegan stuffing recipe could easily pass as a meatless main course. It’ll definitely be at the center of my plate at Thanksgiving this year! How to Make Vegan Stuffing This vegan stuffing recipe comes together with just a few simple steps:
Vegan Stuffing Recipe Tips
Vegan Stuffing This vegan stuffing recipe is best when it's made with dry, day-old bread. I recommend buying or baking your bread one to three days in advance so that it really soaks up the savory flavor of the onion, celery, mushrooms, and herbs.Ingredients
On The Way A/C, Plumbing, & Electrical
Ronnie Bedard We proudly serve our community with top-quality plumbing, electrical, and HVAC services in Santa Fe, TX. With the experienced team at On The Way handling your needs, you can sit back and relax knowing that all your repairs will be done quickly and efficiently. We pride ourselves on a high standard of excellence, over 20 years of experience, and a long list of happy customers. Our repairs and services keep the Santa Fe and Galveston County communities comfortable and safe daily. Schedule service with us today! www.onthewayprossantafe.com onthewaypros@yahoo.com (409) 945-7202 #memes.#socialmedia.#like.#photooftheday. #facebookmarketing.#trending 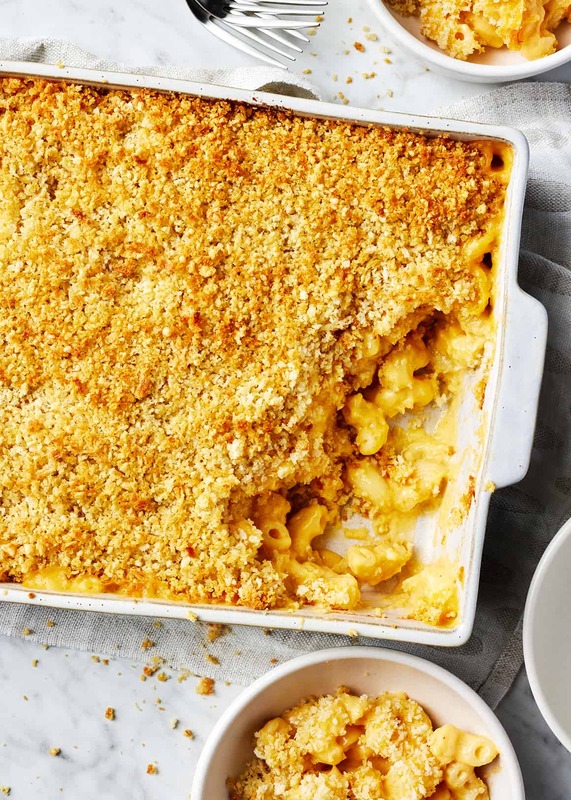 If your family is anything like ours, then this baked mac and cheese recipe will be a huge hit. John can’t get enough of it, I keep finding myself going back for more, and our kiddo has been asking for “MAC!” ever since the first time he tried it. It’s creamy, it’s cheesy, and it’s packed with gooey noodles and crispy, toasty breadcrumbs. Seriously, comfort food doesn’t get better than this. I’ve been wanting to add a baked macaroni and cheese recipe to the blog for a while now. A few years back, I ran an Instagram poll about holiday sides, and so many of you said that homemade mac and cheese was one of your favorites. I hope this recipe makes it onto your Thanksgiving or Christmas table this year. If not, we can attest that it’s a delicious everyday dinner too. Enjoy! Homemade Mac and Cheese Recipe IngredientsIf you’re used to eating mac and cheese from a box, get ready. This homemade macaroni and cheese is on a totally different level. Here’s what makes it so great:
How to Make Baked Macaroni and Cheese Ready to make this homemade mac and cheese recipe? Start by prepping the breadcrumb topping and cooking the pasta. Set them aside while you make the sauce. First, you’ll make a simple béchamel sauce, a classic French sauce made from a roux and milk. To make the roux, you’ll melt the butter in a large pot over medium heat. Add the flour to the melted butter, and whisk continuously until the mixture turns light brown. Slowly pour in the milk, whisking continuously. Then, add the seasonings. Whisk in the garlic, mustard, paprika, salt, and several grinds of pepper. Bring the sauce to a simmer, still whisking continuously. Next, add the cheddar and Gruyère cheeses, and keep whisking until they’re melted. Cook the sauce over medium-low heat, whisking often, until it thickens slightly, about 6 to 8 minutes. You’ll end up with the creamy, cheesy deliciousness pictured above!! …and stir to coat. Then, assemble and bake. Transfer the cheesy noodles to an oiled baking dish, and sprinkle with the breadcrumb topping. Bake at 425°F until the topping is crisp and the cheese is bubbling, about 20 minutes. Serve as a main dish with a salad or roasted broccoli or as a crowd-pleasing side dish! This mac and cheese is best on the day it’s made, but leftovers will keep in an airtight container in the fridge for up to 3 days. Pop them in the microwave to reheat, or warm them in baking dish covered with aluminum foil in a 350°F oven. Mac and Cheese Recipe Tips
Del Bosque Plumbing, LLC
WE SPECIALIZE IN RESIDENTIAL AND COMMERCIAL INSTALLS AND REPAIRS. BACKFLOW SERVICES SPECIALIZING IN THE TESTING, AND REPORTING OF VARIOUS BACKFLOW ASSEMBLIES. LOCALLY OWNED AND OPERATED WITH OVER 25 YEARS OF EXPERIENCE. (409) 934-4129 #PLUMBING #DELBOSQUEPLUMBING #galvestoncounty #smallbusiness #tacos #shoplocal #eatlocal #community #friends #mycuprunnethover #blessed #getoutandvote #memes.#socialmedia.#like.#photooftheday. #facebookmarketing.#trending |
What is Thanksgiving celebrated for?
|
 RSS Feed